Whacko Spring Backend Two: JPA
by: theresa tech learningWelcome back to the chronicles of ISE-induced distress ISE-enabled personal advancements! We will build a RESTful backend for a Slack-inspired messaging application using the SpringBoot framework and a MySQL database to be run in a Docker container.
Firstly, let’s drop all our fears and doubts for a moment, suppress the desire to ponder existential questions and inhale deeply in order to open up IntelliGayJ. I briefly contemplated which IDE to use and ended up choosing IntelliJ for these reasons:
- IntelliJ’s project setup wizard makes it really easy to generate SpringBoot project templates. If you want to use a different IDE, you can configure and download your project template here.
- IntelliJ is from JetBrains, as is Kotlin. My gut feeling (women, I know) tells me that this might come in handy somewhere along the way.
Create a new project and select Spring Initializr.
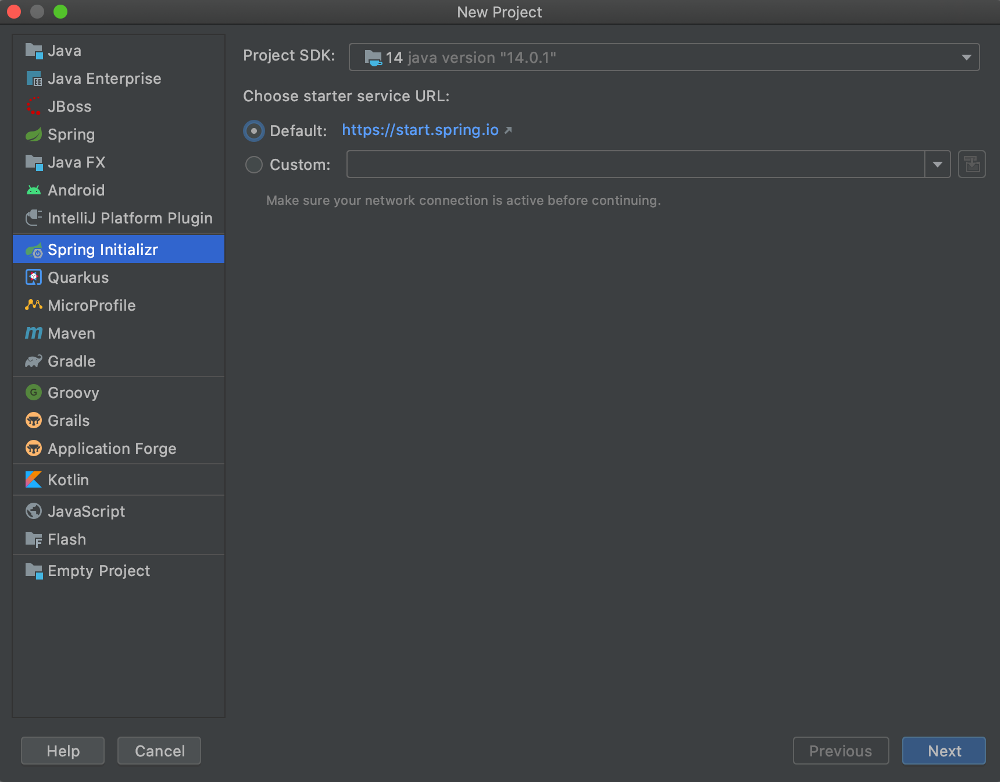
Name the group and artifact … tbh I don’t really know what this is but I doubt it matters much, let’s pick some weird-ass names to show off how incredibly goofy we are! Important: select Kotlin as the language.
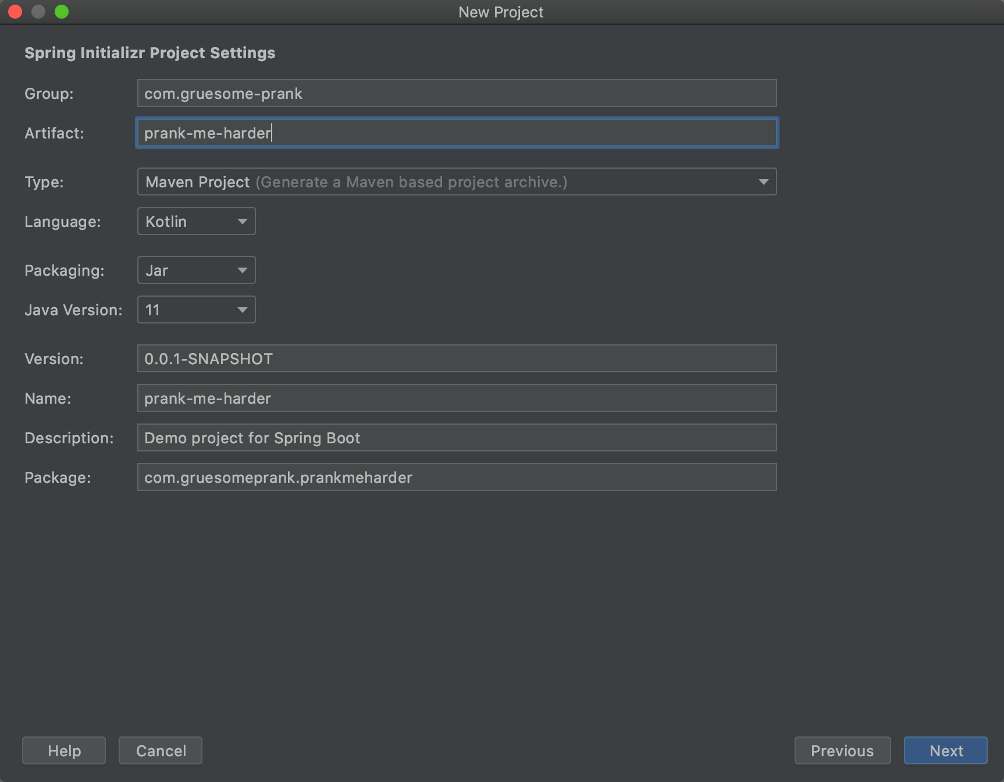
Now let’s play a fun game: select as many dependencies as possible! Jk, who would be this childish … be sure to only select the dependencies you really need!!! These would be … I’m not entirely sure yet, but we def need Spring Web (it helps with building RESTful web services and includes a Tomcat server) and Spring Data JPA (for storing our POJOs in a relational database). As for the remaining dependencies selected in the screenshot - I figured they might be useful in general (Dev Tools), for additional REST functionality I probably won’t might need (Rest Repositories HAL explorer), pagination (HATEOAS) and authentication (Cloud OAuth2).

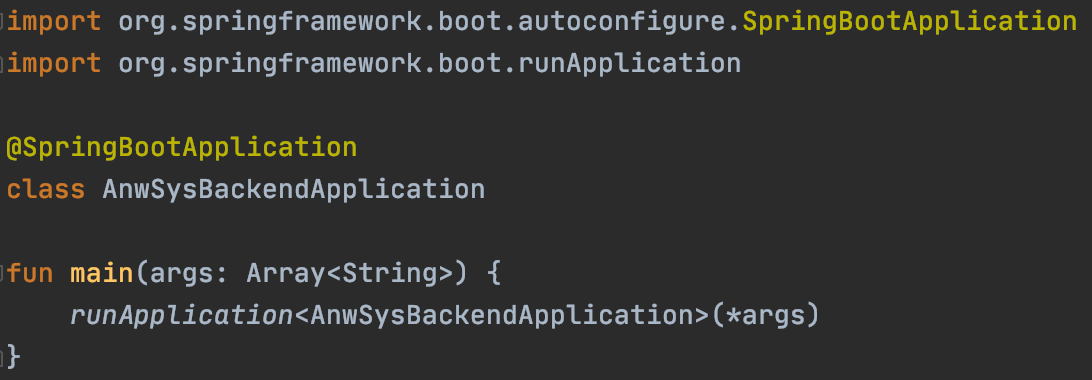
Based on this input, IntelliJ has created a project skeleton (spooky) including a class which will contain our main application/business logic and a POM.xml describing the configuration (including dependencies, versions and a few settings needed in order for SpringBoot to work with Kotlin1).
Desperately clinging to the recommended sequence of steps as if they were the only life-saving straw in an ocean of tears, our young contestant (ok, ok, by now we all have an inkling that we’re talking about the author here) embarks on a quest to complete the first step: specifying those god-forsaken POJOs (primarily ondulating jaw-dropping obfuscators, ehm, Plain Old Java Objects) and providing them with the appropriate JPA annotations (no more jokes, we’re all adults here and this is a very serious blog post, so there you go, JPA stands for Java Persistence Entity).
This is a great opportunity to start revising course material! Let’s find out more about JPA.
- The Java Persistence API enables developers to manage data in relational databases programmatically. JPA achieves this by means of a so-called object-relational mapping (ORM), i.e. rules that guide the representation of OOP (object-oriented programming) concepts in relational databases.
- The
JavaJVM language equivalent of a table in a relational database is an entity class. Each entity instance (that’s the POJO!) corresponds to a row in that table. - By using annotations, meta-information can be provided.
Let’s draw a little diagram of the required entities based on the API we have been given by the assignment-assigning overlords (yup, I used the titan among graphics tools, PowerPoint. No, thanks, I don’t want to use some weird UML software I was introduced to by my idol Sabine Glesner). Thereby, we can find out which annotations are appropriate.
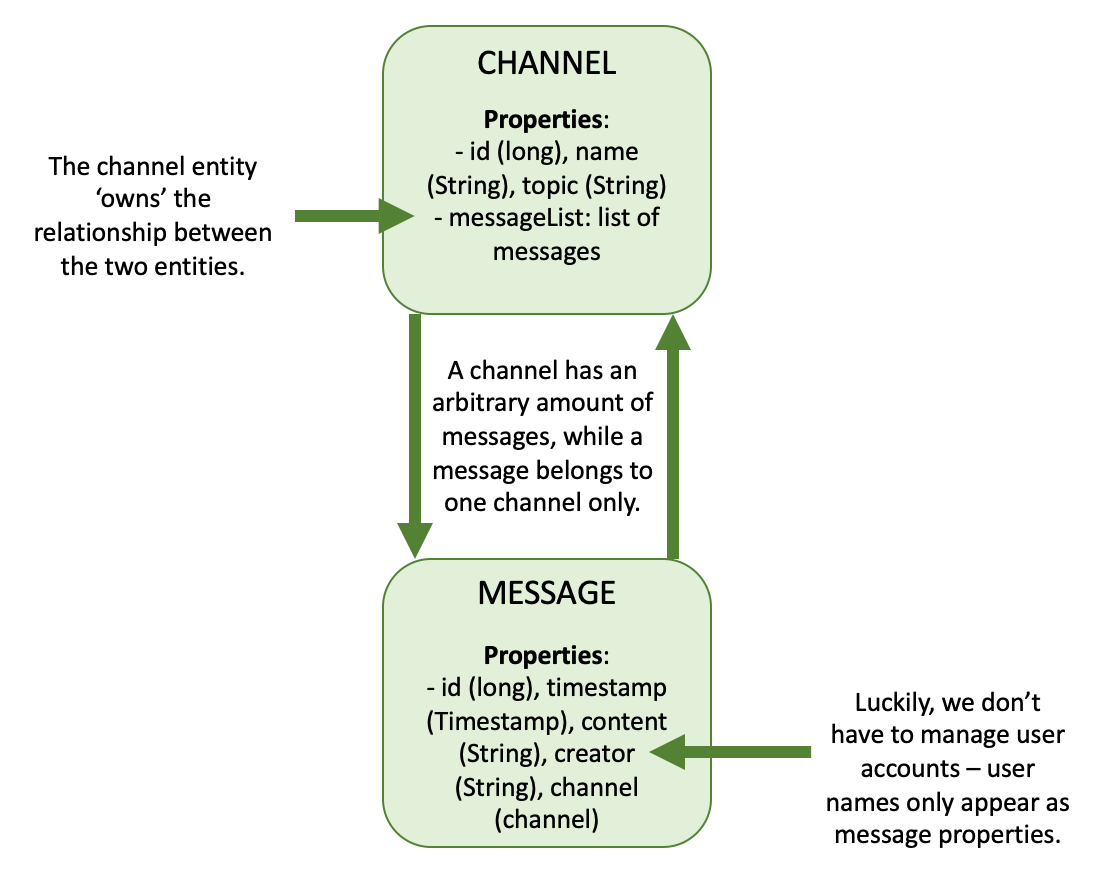
The ORM to be realised here is embarrassingly simple. Only two entities are needed: chat channels and messages. The overlords allow us to keep it simple by avoiding user account management: users only appear in the form of the messsages' creator property.
The first step therefore consists in creating two Kotlin classes: Channel.kt and Message.kt. I will now turn to a helpful YouTube tutorial to find out how to set them up as JPA entities. The first thing to note is that entity classes are simple POJOs, so no superclasses have to be extendend (remember OOP? This is him now 🧑🌾) or interfaces implemented; we only need to annotate the class as an entity (@Entity(name="")). The assigned name has to be unique for the persistence unit and is used for referencing the entity in JPA queries. By default, each entity class maps a database table with the same name in the default schema of the utilized database. Customizations can be realized using the @Table-annotation. All entity class attributes are mapped onto table columns with the same name; to map onto a column with a different name or exclude an attribute from Insert and/or Update statements) the @Column(name = "", updatable = false, insertable = true) annotation can be used. For our simple project, I’d say we don’t need it.
JPA and Hibernate2 require the specification of at least one primary key attribute (remember relational databases? This is them now 🧟♂️🧞♀️🧙🏻♀️) for each entity. To provide it, supply an attribute with the @Id-annotation. The Ids of our channels and messages will simply be auto-incremented numbers, which can be achieved by means of the @GeneratedValue(strategy = GenerationType.IDENTITY) annotation.
After we have provided the channel and message entity classes with their basic properties as shown in the diagram above, we now need to map their association (modeled as foreign key values in relational databases). In JPA, these assocations are mapped as attributes of the type of the associated entity or a collection of associated entities in the respective domain model. Types of mappings are OneToMany, ManyToOne, ManyToMany or OneToOne. Here, channels have a OneToMany association with messages, which we’ll indicate using this annotation: @OneToMany(mappedBy = "channel",cascade = [CascadeType.ALL])3. As a complement, messages have a ManyToOne relationship with channels: @ManyToOne(fetch = FetchType.LAZY)4.
All in all, our classes look like this:
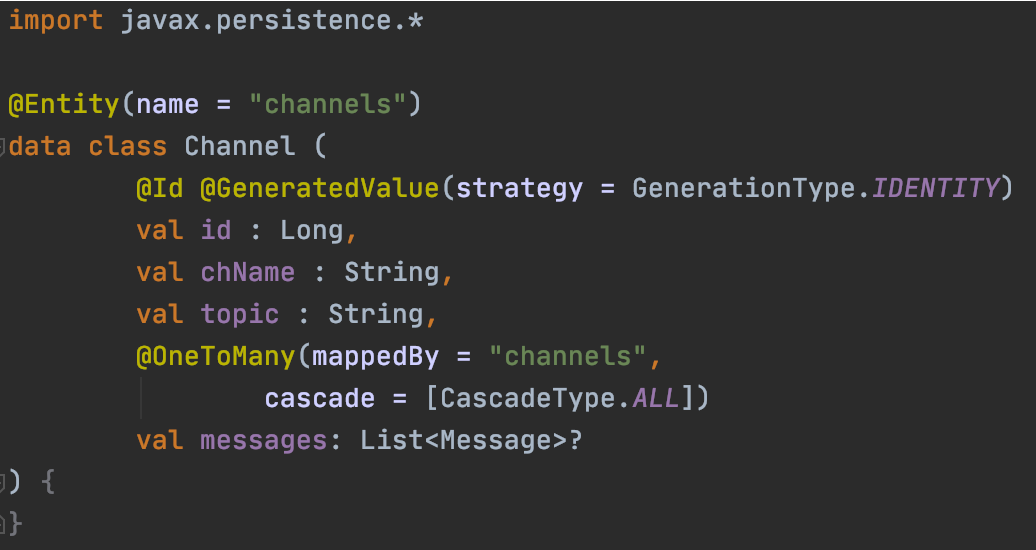
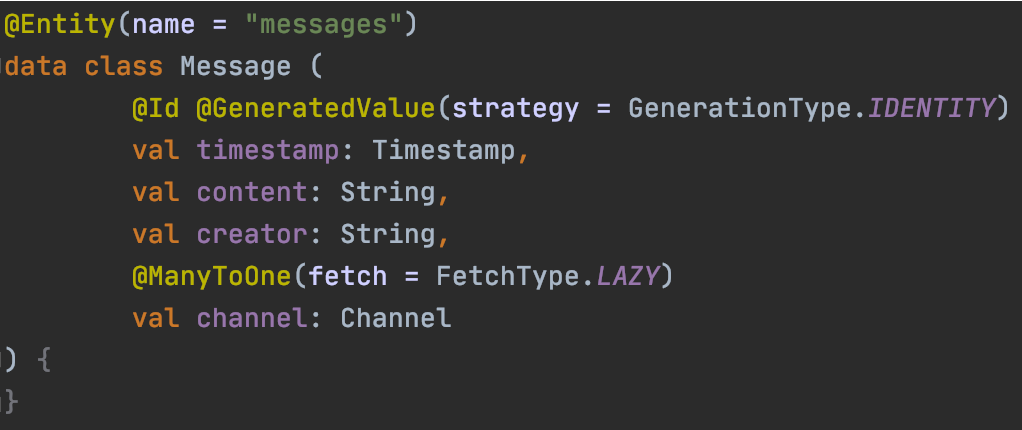
Note the massive perk provided by Kotlin here: thanks to the data class concept, we don’t need constructors, getters, setters and all the other Java gibberish.
-
A few compiler plug-ins are required for Kotlin to work with SpringBoot. IntelliJ adds them automatically when generating a SpringBoot project with Kotlin using the IDE’s wizard. ↩︎
-
JPA is just a specification that defines a number of interfaces and their functionality. Actually using JPA necessitates an implementation, with Hibernate being the most popular one (learned from this blog post). ↩︎
-
The
mappedBy-property defines ownership of the relationship, but in a slightly unobvious way:mappedBy = "channel"means that the field (!)channelin theMessageentity owns the relationship.CascadeType.ALLmeans that all entity operations shall be cascaded to the associated entities (just for completeness, if this last sentence sounded like I don’t know what I’m talking about that’s because it’s true). ↩︎ -
FetchType.LAZYsignifies that the persistence provider should fetch the referenced entities from the database only when they are needed. ↩︎